Thank you for obtaining a (trial) license for the on premises version of MergeBoard. This guide will help you setup our Docker image and get started with MergeBoard. Before we can begin, make sure that the following requirements are met:
- A x86_64 server with at least 4 GB of free RAM and Docker installed
- The server can access https://docker.mergeboard.com
- You received the login credentials for our Docker Registry
- You received a license key
If you didn’t get the login credentials or the license key, please contact our support at support@mergeboard.com.
Step 1: Start MergeBoard
To download the Docker image, you first need to authenticate against our Docker Registry:
docker login docker.mergeboard.com
Just use the credentials you obtained from us. They stay valid until your license expires.
You should now be able to pull the latest version of MergeBoard:
docker pull docker.mergeboard.com/on-premises/stable/mergeboard
We could now spin up a MergeBoard container, but we should first decide where to store certain files. MergeBoard uses configuration files that you might want to edit and needs a place to store all the dynamic data. We suggest to bind mount the configuration directory into your host system, so that you can easily modify the configuration options. For the dynamic data we recommend using a named volume to preserve the data across image updates.
Let’s start with the configuration directory. In this example we will use /etc/mergeboard/, but you can substitute it with any other directory - at least when you followed the official installation instructions of Docker. When using the Docker Snap packages, the configuration directory must be located somewhere within your $HOME directory. If the directory doesn’t exist yet, create it:
mkdir -p /etc/mergeboard
# Alternatively, when using Docker Snap packages:
# mkdir -p ~/.config/mergeboard
Continue by creating our named volume to store all the dynamic data of the container:
docker volume create --name mergeboard_data
That’s it. We can start the container:
docker run -d --restart always --name mergeboard -v /etc/mergeboard:/etc/mergeboard -v mergeboard_data:/data -p 127.0.0.1:8080:80 docker.mergeboard.com/on-premises/stable/mergeboard
In this example we bind the HTTP port of MergeBoard to 127.0.0.1:8080. The reason is that we intend to place MergeBoard behind an Nginx proxy as described later on. You can also directly expose the port, but we recommend to use a TLS terminating HTTP proxy to provide transport security. The container is configured to always start with Docker.
If you need to control the SSL CAs trusted by MergeBoard, e.g. add your own CAs, follow these steps.
Step 2: Configuring MergeBoard
After starting the container for the first time, a new file should appear at /etc/mergeboard/server.conf. You should open the file and adjust the configuration options to your needs. You only need to care about the values below [instance] and [smtp], everything else is already optimized for the Docker container.
You should especially pay attention to the following values:
[instance]
# secure = True
hostname = localhost
trusted_proxies = 172.16.0.0/12
The secure flag needs to be set to True (default) when MergeBoard is running behind a TLS proxy. The flag makes sure that all generated URLs start with https:// and enables HTTPS-only cookies. If the flag is set incorrectly certain features will be broken.
The hostname value must match the hostname under which MergeBoard is reachable. This can either be a domain (e.g., mergeboard.company.com) or an IP address (e.g., 10.1.2.3), optionally including any non standard port (e.g., 10.1.2.3:8080). Setting an incorrect value will cause issues. Serving MergeBoard with a path prefix is currently not supported.
If you are running MergeBoard behind a reverse proxy server, the trusted_proxies value must be set to a comma separated list containing the IP addresses of the proxy servers. The value is used to determine whether the X-Forwarded-For and X-Forwarded-Proto HTTP headers can be trusted. Leave the value empty if your users are accessing the MergeBoard Docker container without a reverse proxy.
The [smtp] section should be self explanatory. Just keep in mind that 127.0.0.1 points to the loopback interface within the Docker container and not the MTA running on your host system. You can also use an external mail server. Here is an example for gmail:
[smtp]
from = MergeBoard <email@gmail.com>
host = smtp.googlemail.com
port = 465
encryption = tls
username = email@gmail.com
password = mypassword
Before you continue it makes sense to test the smtp configuration first. The docker image contains a script mergeboard-smtp-test that you can use to send a test mail to verify that everything works correctly. You can invoke it like this:
docker exec mergeboard mergeboard-smtp-test your@mail.com
If no errors are printed and you received the test mail, you can proceed by restarting MergeBoard for the configuration to take effect. The easiest way to do this is to restart the container:
docker restart mergeboard
Step 3: Use Nginx as reverse proxy (optional)
When making MergeBoard accessible via the internet it is highly recommended to secure the communication via TLS. Otherwise user credentials might be captured and the security of your review process and repositories might be compromised. The Docker container itself does not support TLS as it is difficult to anticipate all the required configurations (static certificates, Let’s encrypt, …). We instead suggest using a reverse proxy to terminate the TLS encryption and forward the requests to the Docker container. This approach makes it also easy to collect statistics or log the communication if desired.
If you are using Nginx, you can make use of the following configuration template:
server {
    listen 80;
    server_name mergeboard.company.com;
    proxy_redirect off;
    server_tokens off;

    location / {
        rewrite ^ https://$http_host$request_uri? permanent;  # force redirect http to https
    }
}

server {
    listen 443 http2 ssl;
    server_name mergeboard.company.com;

    # Example key files when using letsencrypt
    ssl_certificate /etc/letsencrypt/live/mergeboard.company.com/fullchain.pem;
    ssl_certificate_key /etc/letsencrypt/live/mergeboard.company.com/privkey.pem;

    # TLS configuration to achieve A+ at https://www.ssllabs.com/ssltest/
    ssl_protocols TLSv1.2 TLSv1.3;
    ssl_ciphers 'ECDHE-ECDSA-AES256-GCM-SHA384:ECDHE-ECDSA-AES128-GCM-SHA256:ECDHE-RSA-AES256-GCM-SHA384:ECDHE-RSA-AES128-GCM-SHA256:ECDHE-ECDSA-AES256-SHA384:ECDHE-ECDSA-AES128-SHA256:ECDHE-RSA-AES256-SHA384:ECDHE-RSA-AES128-SHA256:ECDHE-RSA-AES256-SHA:ECDHE-ECDSA-AES256-SHA:ECDHE-RSA-AES128-SHA:ECDHE-ECDSA-AES128-SHA:DHE-RSA-AES256-GCM-SHA384:DHE-RSA-AES256-SHA256:DHE-RSA-AES256-SHA:DHE-RSA-CAMELLIA256-SHA:DHE-RSA-AES128-GCM-SHA256:DHE-RSA-AES128-SHA256:DHE-RSA-AES128-SHA:DHE-RSA-SEED-SHA:DHE-RSA-CAMELLIA128-SHA:HIGH:!aNULL:!eNULL:!LOW:!3DES:!MD5:!EXP:!PSK:!SRP:!DSS';
    ssl_prefer_server_ciphers on;

    # Enable HSTS
    add_header Strict-Transport-Security "max-age=31536000; includeSubDomains";

    server_tokens off;

    access_log  /var/log/nginx/mergeboard_access.log;
    error_log   /var/log/nginx/mergeboard_error.log;

    # Enable gzip to compress the transmitted source code
    gzip on;
    gzip_types *;

    location ~ ^/api/v1/notifications/listen$ {
        proxy_http_version 1.1;
        proxy_set_header Host $http_host;
        proxy_set_header Connection "upgrade";
        proxy_set_header Upgrade $http_upgrade;
        proxy_set_header X-Forwarded-For $proxy_add_x_forwarded_for;
        proxy_set_header X-Forwarded-Proto $scheme;
        proxy_redirect off;
        proxy_buffering off;
        proxy_pass http://127.0.0.1:8080;
    }

    location / {
        proxy_set_header Host $http_host;
        proxy_set_header X-Forwarded-For $proxy_add_x_forwarded_for;
        proxy_set_header X-Forwarded-Proto $scheme;
        proxy_redirect off;
        proxy_buffering off;
        proxy_read_timeout 10m;
        proxy_pass http://127.0.0.1:8080;
        client_max_body_size 256M;
    }
}
Don’t forget to adjust the TLS certificates and domain name.
Step 4: Import your license
You are now ready to get started with MergeBoard. Open the address of your MergeBoard instance in your browser and login using the credentials admin/admin as username/password. The account was created during the installation. When you login, you will be asked to provide a new and secure password.
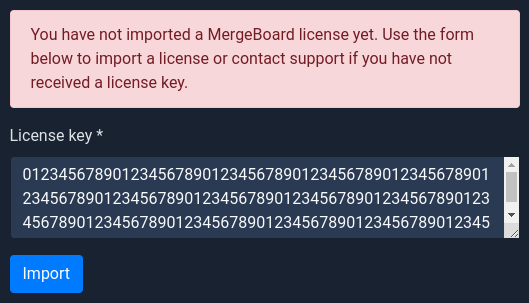
To use all features of MergeBoard, you still need to import the license key we have provided. Within MergeBoard, go to Administration -> Billing. Enter the license key (should be an alphanumeric string) in the input field and click on Import. Your license should now show up in the list at the top of the page, along with the start and end dates of validity.
For information on the usage of MergeBoard, click on the question mark symbol in the top right corner of the user interface. It opens a new dialog with videos and documentation entries related to your currently opened page. If you have further questions, don’t hesitate to contact support@mergeboard.com.
Modify Trusted SSL Root CAs
The MergeBoard Docker image uses the default SSL root CAs provided by Debian Bullseye to authenticate external services such as git hosters, issue trackers or SMTP servers. If you want to integrate an external service that isn’t signed by a standard CA (e.g. a GitLab instance with a self-signed certificate), you need to provide the Docker container with the appropriate CA certificates.
The easiest way is to bind mount the required CA certificate into the Docker container. This can be done by appending the following arguments to the docker run call:
-v /some/dir/my_ca.crt:/usr/local/share/ca-certificates/my_ca.crt:ro
If you need to provide multiple certificates, you can also bind mount the whole directory instead:
-v /some/dir/ca_dir:/usr/local/share/ca-certificates:ro
All certificates must be provided in PEM format and need to have .crt as file extension.
If the certificates are provided in the correct way, the docker log for the container (docker logs mergeboard) should contain an entry like this:
Updating certificates in /etc/ssl/certs...
1 added, 0 removed; done.
Running hooks in /etc/ca-certificates/update.d...
done.
If you want to not only add certificates but have also full control over the trusted CAs, you can override /usr/share/ca-certificates/ with a bind mount. We don’t recommend this as it can lead to subtle bugs.
Upgrade MergeBoard
If you want to upgrade MergeBoard simply fetch the newest version, delete the old container and start a new one. All dynamic data is preserved by the mount point and volume.
docker pull docker.mergeboard.com/on-premises/stable/mergeboard
docker stop mergeboard
docker rm mergeboard
docker run -d --restart always --name mergeboard -v /etc/mergeboard:/etc/mergeboard -v mergeboard_data:/data -p 127.0.0.1:8080:80 docker.mergeboard.com/on-premises/stable/mergeboard
You can verify the version of MergeBoard in the administration dashboard.
Upgrade License
The license keys we provide are only valid for a certain period of time and contain a limit on how many users you can manage. After the period expires or if you want to exceed the user limit, a new license key is required.
To import a new license key, go to Administration -> Billing. Enter the new license key (should be an alphanumeric string) in the input field and click on Import. Your license should now show up as first entry in the list at the top of the page, along with the start and end dates of validity. If multiple licenses are listed, the most recently imported one that is valid for the current date will be used. You can also remove licenses again if you want to use them on a different machine or to delete obsolete entries.